MpegBox Car MP3 Player by Jeff Mucha |
- News:
I designed a microprocessor shut down controller This unit will detect the voltage at the battery and it has a temperature sensor that makes sure the computer is going to turn on in a safe temp range it is available now at www.mp3car.com if you want to buy one.
Check out a new gadget I invented for the christmas tree. This is a review I wrote for a product I invented (so Yaa it's biased...) and I'd like to see it get into retail stores for Christmas.
I am now selling MPBS1 Power Supplies to fellow hobbyists. The power supply seems to be one of the biggest stumbling blocks when implementing a car computer. This power supply will work for many applications but I don't sell many of them and that is why I have to ask what I ask. The component prices along with all the labor it takes to build them drives the price up. I do it because people make some pretty cool boxes with my design and that satisfaction is pretty cool. Purchase an MPBS1 Power Supply!
Here is the AC waveform measurement data
I Just bought a PLL based FM transmitter. This is far better than the ones that have a tuning dial because it locks on to the exact frequency. It has very good audio frequency response and only cost 25 dollars. The crummy ones will drift in frequency. I took the thing apart and it has a microprocessor and a quartz crystal along with what I imagine is a pll synthesizer which has the markings scraped off. They probably wanted to keep the design from people like me :-) I highly recommend this as a way to connect to a CD player that doesn't have aux in or if your mp3 player has buzzing coming in over the RCA jacks. Or if you just want it wireless!! Click This Link and then click on MP3/VCD/CD Player on the upper left of the page. At the bottom you will see the Link-it FM Transmitter.
See some really cool pictures of Mpegbox3 and my setup with GPS, Crummy FM Transmitter, and Sony PSone display. Cool low light Shots
See a graph of how much typical processors use for power. The MPBS1 can only supply 25 watts of CPU power. CPU_power
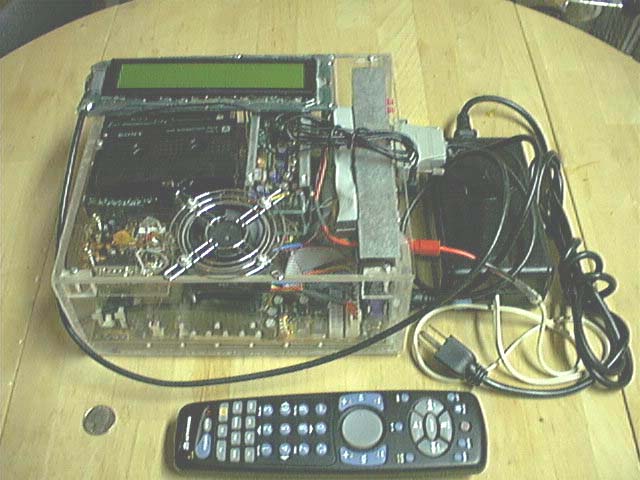
See pictures of the new mpegbox3 with the custom MPBS1 DC-DC Power Supply! I finally got a new Digital camera! Mpegbox 3
MpegBox 2 was stolen last night (june 17-18) If you find it, I will give you a reward and be very grateful. Corvallis OR Police Report # 01-6017
- Overview:
These systems are nothing more than a PC motherboard with lots of onboard features packed into the smallest case I could make in my garage. Each system can hold a number of MP3s relative to the size of the hard drive I decided to use. MpegBox was screwed together on an oak frame, when I came around to building MpegBox 2, I found acrylic cement at the local glass shop.- This page is dedicated to a project I started on in 1998. I have made two of these "Plexiglass Computers." The first of which runs off of 120V AC and the second one runs off of 12V DC. I call these machines "MpegBox" and "MpegBox 2"
- This page is dedicated to the design and ideas in building and configuring MpegBox 2 - The Car MP3 Player / Plexiglass Computer.
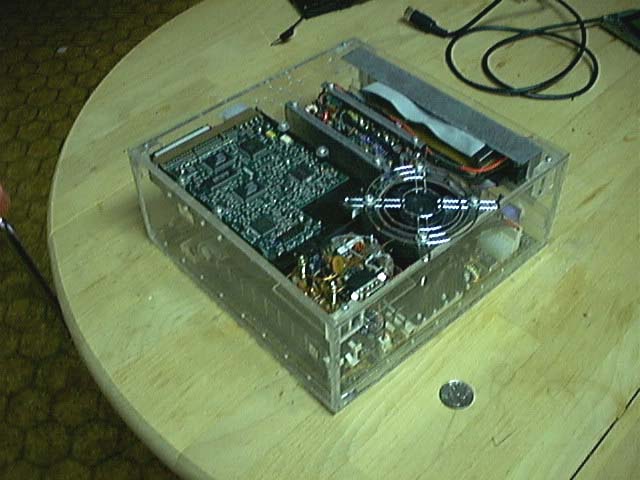
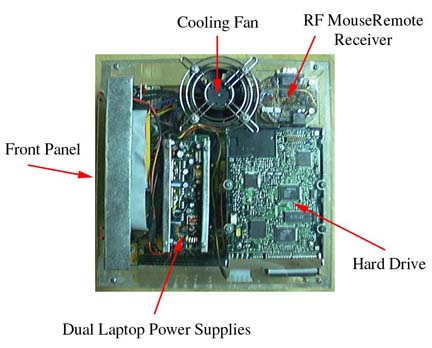
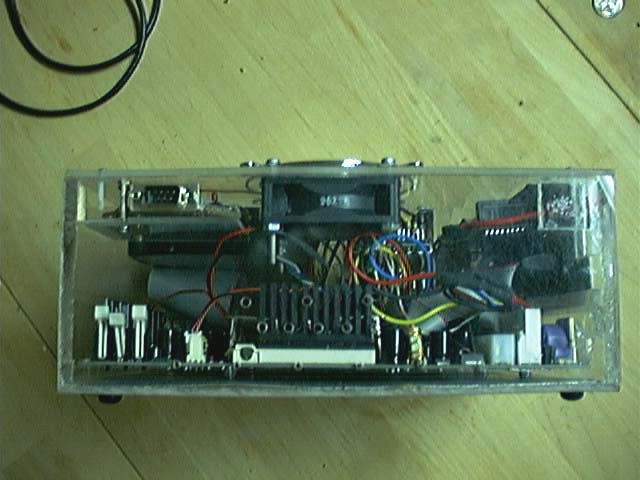
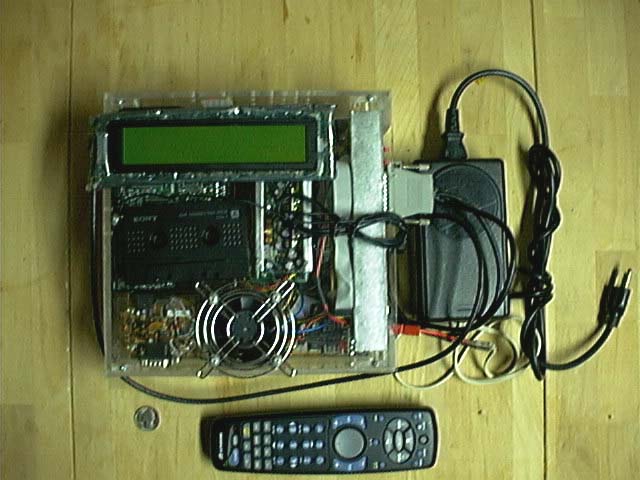
Top View:
Here you can see the main components to this mp3 computer. The Physical dimensions of MpegBox 2 are 9.5" by 9.5" by 4".
The top is held on by four screws that were tap and threaded directly into the Plexiglass.
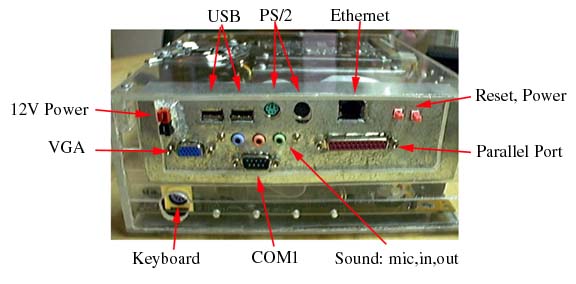
Front View:
All the ports to this box come off this panel. When the system is used in the car, the ports that are used are: Keyboard, Sound-out, Parallel, and 12V Power.
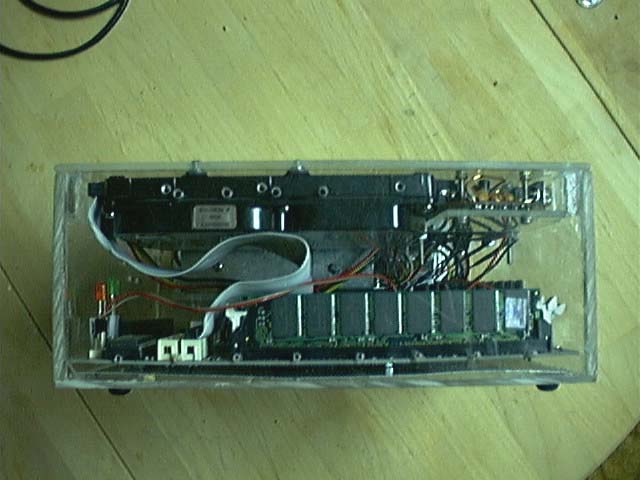
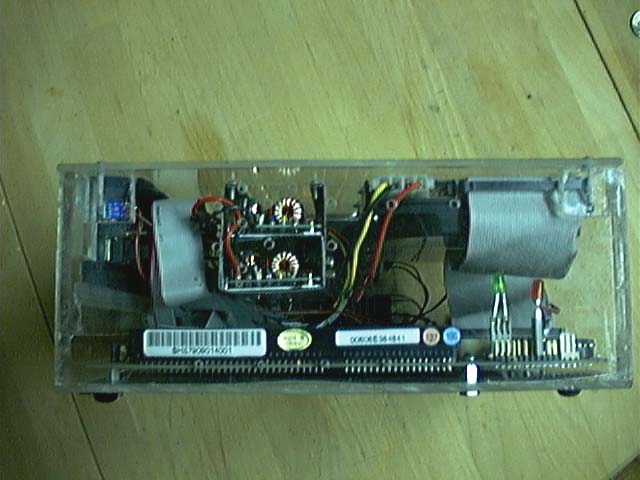
- More Views:
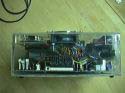
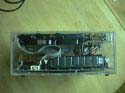

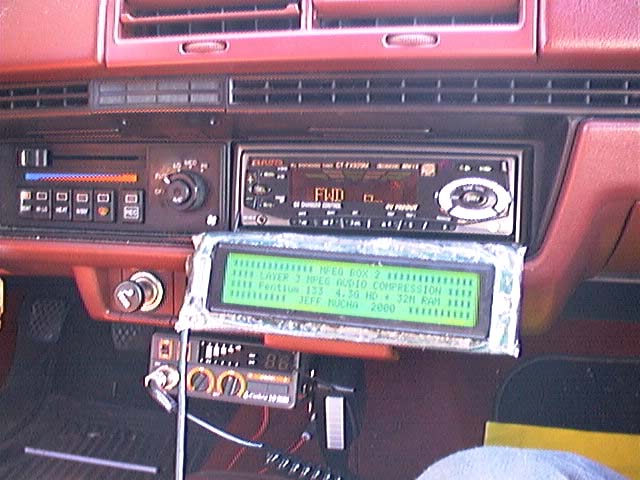
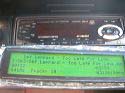
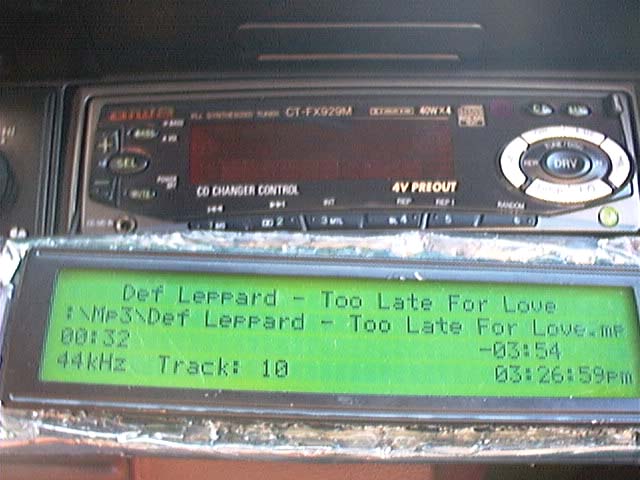
Left View Back View Right View Here is a picture of the complete system for use indoors: Here is a picture of the LCD in action: 
- Hardware:
- The Plexiglass Mpeg Box is nothing more than a PC with all the guts crammed together as tightly as possible. I chose a motherboard that has "on board everything," tethered an LCD display connected to the parallel port, wired up an X10 MouseRemote RF receiver, wired up the necessary power supplies to the AT power connector, and made an I/O plate with all the connectors attached.
- Motherboard:
To do this project I decided that I wanted to find a motherboard that had at least on board sound, ethernet, and video. I found the Amptron 585LMR. This board is of the baby-AT form factor, which means it has the AT power connector as well as connectors for most of the I/O ports. It measures 8.5" square and supports socket 7 CPUs. Here is Here is a system based on the FV24 that is almost just like Mpegbox 3 and it is only $250!
SHUTTLE SV24 VIA VT8363A INTEL SOCKET 370 READY FLEX ATX BAREBONE SYSTEM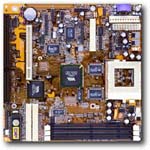
- Power Supply:
Here is a power supply I have designed for the next generation mpegbox: MPBS1 DC-DC ATX Power Supply
- I got two laptop power supplies from Marlin P Jones. When I bought them, there were only a few hundred left so I hope they never blow out. Here is the spec sheet for the AA90304.txt by Astec.
- I wired up the power supply so one of the laptop supplies powers the motherboard and one powers the hard drive. I ran the system off of one power supply, but the 5 volt line draws power very close to its limit of 3.5 Amps and the one power supply got very warm. By using two of them, neither of them get very warm and it does a pretty good job. I had to isolate the individual connections because with both power supplies connected in parallel, one power supply would over current at startup and shut it's self off.
- I also under clocked my CPU. You don't need more than a 486 to play MP3s so I took my spare Pentium 233 and under clocked it to 133. This saved quite a bit on the power draw. The complete system draws about 35 watts or about 3 amps at 12 volts.
- If you want to power your system with a standard power supply in a car, get one of these. This will be able to power any system from a 12 volt lighter outlet. Tripp-Lite 12 volt Power Inverters.
- Since I had to make my own wiring harness to my system, I found the following information useful.
ATX Power Connections:
(with color codes)
AT Power Connections:
(with color codes)
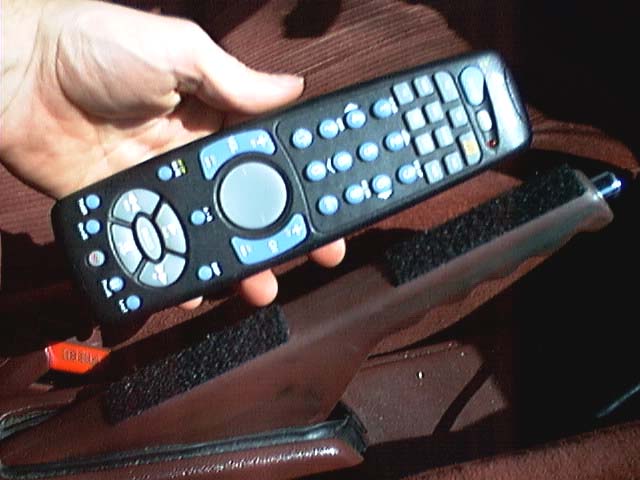
RF MouseRemote:
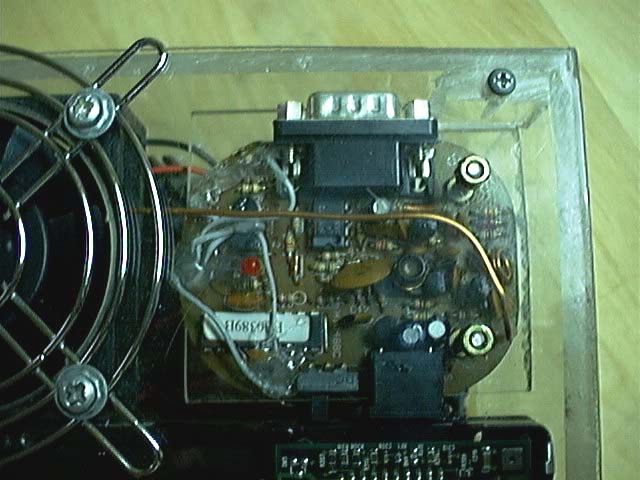
The X10-MouseRemote comes with a wireless RF interface to the computer. It will connect to the PS/2 port or the serial port. There are plugins that work with WinAmp that use the serial port of the computer to interface the MouseRemote. I did not have much luck using the serial port on my machine so I hacked together the PS/2 interface and hard wired it to the PS/2 port of my motherboard. You can see the circuit board in the top view picture above.
I paid 30 bucks for my MouseRemote, it looks like they jacked the price to 50? I'd wait for a sale to get another one of these.

This is the Mouse Remote from X10 >>
<< Here is an image of the RF receiver on MpegBox 2.
It is a good idea to use hot melt glue to "strain relief" connections made to circuit boards so the wires don't get stressed and break off.
-
- LCD Display:
- The LCD for MpegBox 2 is a standard backlit 40x4 character display. I bought it for 15 dollars from TimeLine. I wired it up using lcd.GIF below as a guide.The 40x4 display has a 16 wire interface where as the 20x4 has a 14 wire interface. The difference is the second Enable line, 40x4 displays have two Hitachi HD44780 controler chips on them. On standard LCDs, pins 1-7 are data, pins 9-11 are control, pin 12 is contrast adjust, pin 13 is ground, and pin14 is 5 volt power. If there are two controler chips on the LCD ie. the 40x4, pin 15 is also a control line. All the data and control lines can be wired directly to the parallel port of a computer. Go here for more details of how to implement an LCD display.
- In order to make a connection from the LCD to the computer you need to get 5-volt power. Most parallel ports do not supply enough power to operate an LCD. I decided to use the keyboard connector to power my LCD. I have a cable that goes from the keyboard connector to the parallel port connector, and then a cable that goes from the parallel port connector to the display. Go here for the pinout of the PS/2 and AT connectors. To connect my LCD, I found that I need at least 14 wires to go to the 40x4 display (contrast is controled with a potentometer at the LCD). I was able to find some cable that had very small wires. The cable is only 1/8 inch thick and has 16 separate wires in it. I got the wire, AT keyboard connector, and parallel port connector all from the local surplus electronics shop. The LCD is enclosed by an anti-static bag because I could not think of a better solution that would not be big and bulky. It does a very good job of insulating the LCD from everything but it doesn't look as nice as it could.
- Operating System:
- When I first decided to do this project I had to choose an operating system. There are tons of choices and all of them have their advantages. I am a fairly novice Linux user and most of my friends told me I should use Linux or some flavor or embedded Linux. There are single disk distributions of Linux and bla bla bla.. I decided to use Windows, (I know, blah blah... I'm a sellout and the whole bunch..) I did a Win98Lite install and started to hack it down to save time at startup and avoid problems with windows in a non-monitored system. I admit, Linux would be a MUCH BETTER SOLUTION if I had the time to learn enough about it to the point where I could do the same things I did in windows. You would want a hacked down version of the kernel with networking support, RF mouseremote support, and the works.
- Reasons Why I Chose Windows:


- WinAmp is freeware and LCD drivers are already written for it.
- Batch files with playlistes are easy to make and use and associate to keys on the MouseRemote.
- The drivers for the MouseRemote work and are already written.
- It is very easy to update all the music files whenever I want by plugging the box into my local network and having a batch file that will either boot normal windows or boot hacked down windows.
- Things I did to speed up the boot-up process (Hacking
Down Windows):
- Turn Off ScanDisk and Disable Splash Screen:
- Add or change these lines in the msdos.sys file:
[Options]
AutoScan=0
Logo=0
- By setting AutoScan to 0 it disables ScanDisk at startup.
By setting Logo to 0 it gets rid of the splash screen (Windows
9X) at startup. I have used this box in my car for 2 years and
I brought it inside and ran scandisk on it one day and it didn't
have any errors from being power cycled (instead of being shutdown).
- Don't boot into Explorer:
- Edit your system.ini file:
;shell=Explorer.exe
shell=C:\Progra~1\Winamp\Winamp.exe C:\win\startm~1\programs\startup\startup.m3u
- Instead of booting into explorer when Windows comes up, I
have it launch WinAmp and a playlist in this example. You can
replace what comes after "shell=" with a batch file
and have it do whatever you want, load anything you would have
loaded in the startup folder, etc.
- Copying files over the network:
- One thing I like about windows is the built in networking. I set up a batch file that copies a version of system.ini that has the explorer launched when I want to copy files from the network or make system changes in Windows, upgrade WinAmp, etc. To do this, I plug the machine into the network, plug in a 12 volt supply, plug in a mouse and keyboard. I hit F8 at startup and tell it to boot to command prompt. I then run bootwin.bat and it makes that change and loads windows.
- If you set up file sharing, you don't need to have Explorer running, you can plug in the box to the network and have the box still function stand alone while files are being copied to or from it.
- Example Files:
- File info:
- Bootamp.bat: This batch file copies the iniamp.ini file to system.ini in the Windows directory.
- System.ini: This file is the backup of system.ini that loads windows as normal.
- msdos.sys: This files shows the changes to turn off scan disk and kill the splash screen.
- Bootwin.bat: This batch file copies system.ini into the Windows directory.
- Autoexec.bat: This shows how lcdprint.exe can be used to display a startup screen on the LCD.
- lcdprint.exe: This is a program that will print a text file to the display, useful for LCD startup screen and testing.
- Hello.txt: This my txt file that gets printed to the LCD display
- lcd.gif: This is the hookup diagram I found on the web here.
- vis_LCDi.ini: This is my config file for the LCD WinAmp plugin visLCD.
- visLCD572.zip: This is the plugin for WinAmp. The latest version of the LCD display WinAmp plugin can be found here.
- Cost and Parts:
- Here is a breakdown of the hardware costs associated with my Car MP3 Player. I'm sure most of these prices will have changed by the time that you read them, so take it for what you will. If you make one of these, expect to spend about 300 bucks on hardware along with countless hours of your time. Depending on your operating system and software, that can run you from free to hundreds of dollars.
Item Price Amptron Motherboard: PM-585LMR $90 X-10 Mouse Remote $30 Timeline: 40X4 LCD Display $15 PriceWatch: 32megs of SDRAM ~$16 Marlin P Jones: Two Laptop Power Supply Units 2 @ $15 PriceWatch: Pentium 233 ~$50 PriceWatch: 4.3 Gig HD $80 PriceWatch: Heat Sink $5 Scrap Plexiglass (from a local glass shop) ~$5 Wires, Screws, Cables, etc. ~$10
- Links:
- LCD Displays and other stuff : EIO
- Electronics Parts : All Electronics
- More Electronic Parts : Electronic GoldMine
The author of this page is not responsible for any damages caused by someone following the procedures listed above.
This page is presented for entertainment purposes only. All claims are made from experience and are not necessarily fact.
Various trademarks on items are the property of their respective owners.
Send comments or corrections to: Jeff Mucha
©2001 Jeff Mucha. All Rights Reserved.